
One Room Challenge Fall 2019 ~ Week 3
Hello Wednesday and welcome to Week 3 of One Room Challenge. I truly have no idea where the time went and it's hard to imagine my rooms will be done in 2 weeks with finishing touches and ready to be photographed for the final reveal on Nov 7!
I am sure many of us are feeling the heat right now but thanks to #OneRoomChallenge, we are one big supportive community both to inspire and to support each other in our makeovers. Luckily I also have a dream contractor, Eagleview Construction (if you are in the Waterloo / Kitchener area), to keep all the madness under control so I could actually be here right now to share my project progress!

For those who have been following along, the first thing we tackled was installing the beautiful natural grasscloth wallpaper in the office / guest bedroom. I have sourced a good number of samples (roughly 25) before decided on this beauty from the Magnolia Home collection by York Wallcoverings
. Here are by top three reasons of using grasscloth wallpaper:
100% natural material: less chemical and since grass is a fast growing plant, this product is also planet friendly
instant luxury: magically elevate an ordinary room to a designer show piece
sophisticated glam: no other material can compare the shimmery effect of grasscloth in beautiful natural light
Now let's talk about what I have learned from my 14-hour wallpaper installation marathon.

Step 1: make sure you have enough wallpaper to complete the job
I measured the room a few times before I placed my wallpaper order. However, the big windows, the bulkheads, and the corners made it very hard to nail down exactly how much we needed. I thought I could get away with 5 double rolls (especially when there is no pattern match wastage with grasscloth) but my installer came for a quick look and said "you better get one extra roll just in case".
If you happen to be in the same situation, make sure you contact your wallpaper provider with the batch number. That way, they could order you the extra rolls from the same batch, and the color dialog would be a perfect match.

Step 2: prep work
It's important to make sure the walls are smoothed out prior to the installation. The walls may all look perfect to the eyes but if your hands could feel any imperfection, you probably want to smooth that out.
Getting the right wallpaper glue is also key to a successful installation. Wallpaper comes in various weights depending on the materials and some require more heavy duty glue than what is available in your local big box store. Be sure to read the instruction sheet comes with your wallpaper, especially the caution section.


Step 3: pick the first strip + how to cut it
Because visible seams are unavoidable when it comes to grasscloth wallpaper, the installer and I had talked about which wall I want to be the most "seamless" and then worked backward to determine where the first strip of paper should be placed. In my case, the first strip actually went on the least visible wall (the wall behind the door) and with the 36" wide wallpaper, the first few seams actually landed right where the walls or door casing intersect.
Another item to consider is how to install the paper. You could line them up next to each other and push them tight to each other to minimize seams. You could also do the "double cut" technique where you would overlap the paper by a couple of inches, use a super sharp blade to put though the paper, pull off the cut paper from both layers and just like magic, you have created the perfect seam.
We experimented with both options and I went with "double cut" for a clean, crisp look.
Oh and one more thing, keeping the strips straight are utmost important as you really don't want the horizontal lines of your grasscloth wallpaper to look slanted. Invest in a laser level if you are installing it yourself (you can use it for a wide variety of home projects) ... it's far easier than using the handheld level.


Step 4: tight corners
Inner corners, outer corners, bulkheads, windowsills, we have them all in one room and since I decided to cover the entire room with grasscloth, my installer had to deal with them all. One thing about grasscloth wallpaper is that it's quite "stiff", meaning it was "not easy" for my installer to wrap around all the obstacles in the room.
A quick YouTube search landed me with a life saver trick: cloth steamer! Handle with care, and I recommend testing it out first to see how the paper holds up to the steam and heat before going full force on installation. I was so relieved this trick worked because my installer was ready to throw in the towel by the time he tackled the second window.

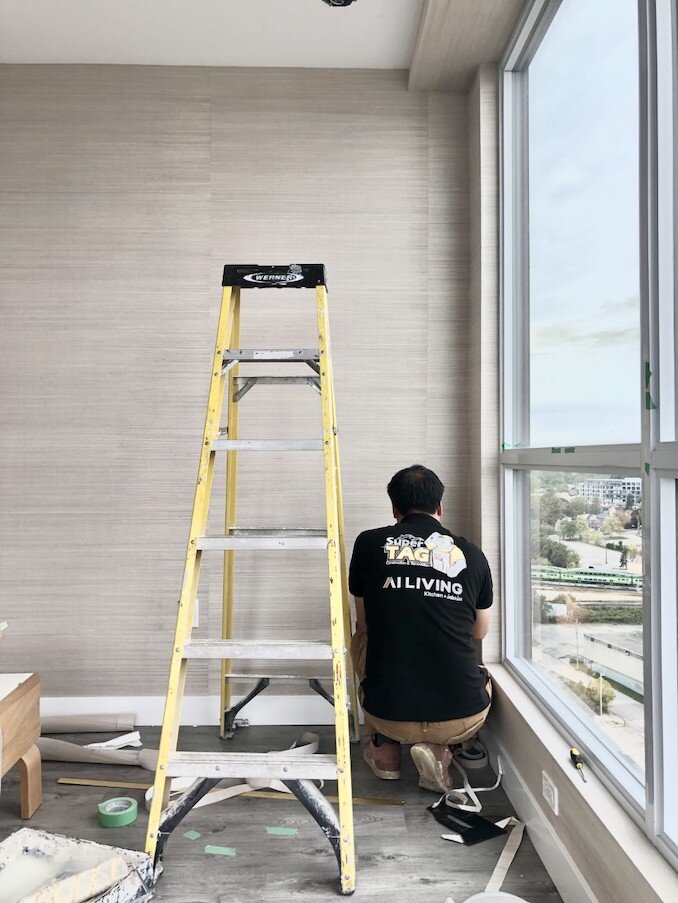
All the hard work, sweat, and steam are so worth it because the room looks absolutely luminous. I wouldn't be able to achieve the same result with just one feature wall. Happily Chris agreed and was blown away the moment he stepped into the room ... the morning after.
I was so excited I even tried out the wall out with my fabulous new art!


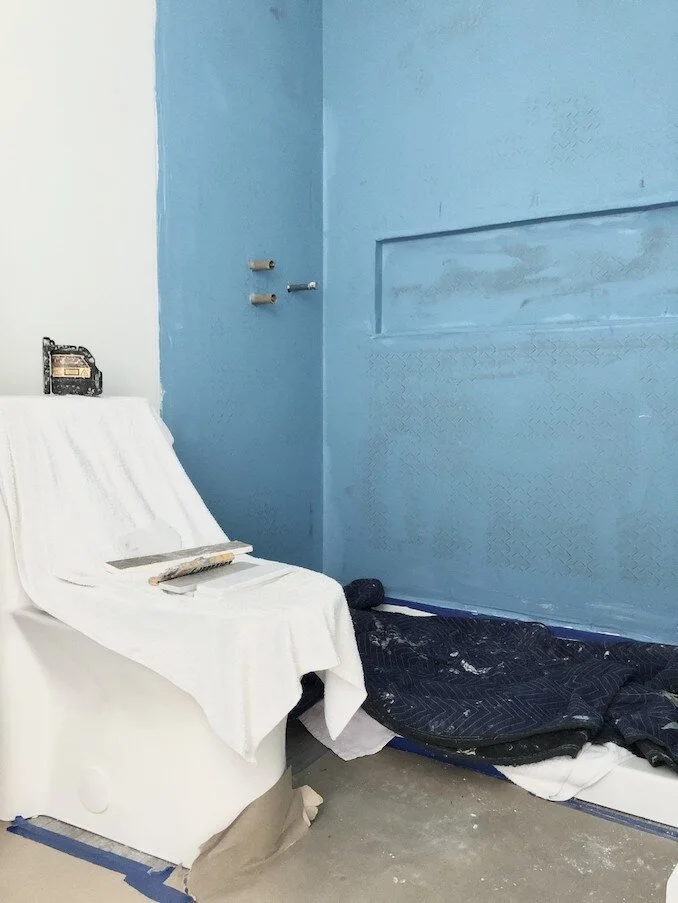
Now let's talk about the ensuite bathroom. We've made great progress last week thanks to my superstar contractor. The walls were all closed up (after a quick plumping fix), the shower niche was framed, and the entire shower received a coat of bright blue waterproofing. The stage was set for tiling.

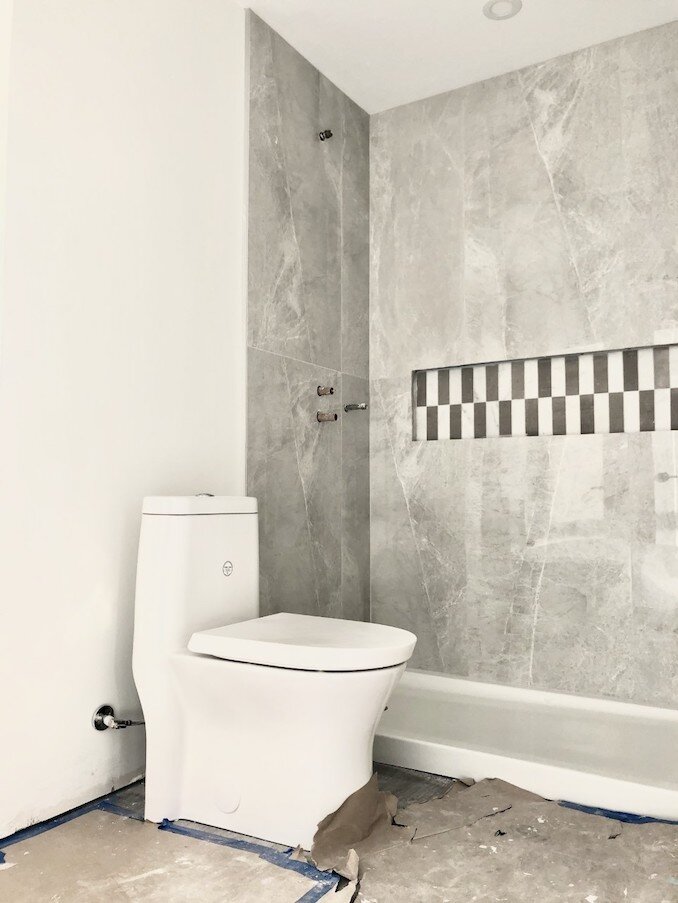
I opted for large scale tiles for the entire shower to create a calm and serene look. They were quite difficult to install and I couldn't be happier with how it turned out. To play up the fun factor (and to add a little pattern to the space), I got creative with the use of simple stone tiles for a two-tone checker pattern: high visual impact with a reasonable price tag.


In the light of day, this shower looks sensational and it's exactly how I had envisioned it. The niche will need its surround (made out of Montauk from HanStone) and I can't wait to see the luxurious DXV Modulus shower system installed.


That's it for Week 3 and it's a tough one. So much still to do over the next 2 weeks but we can do it featured designers and fellow guest participants! See you all in Week 4!
